User Interface
The following section describes the Out’n About! for Outlook user interface.
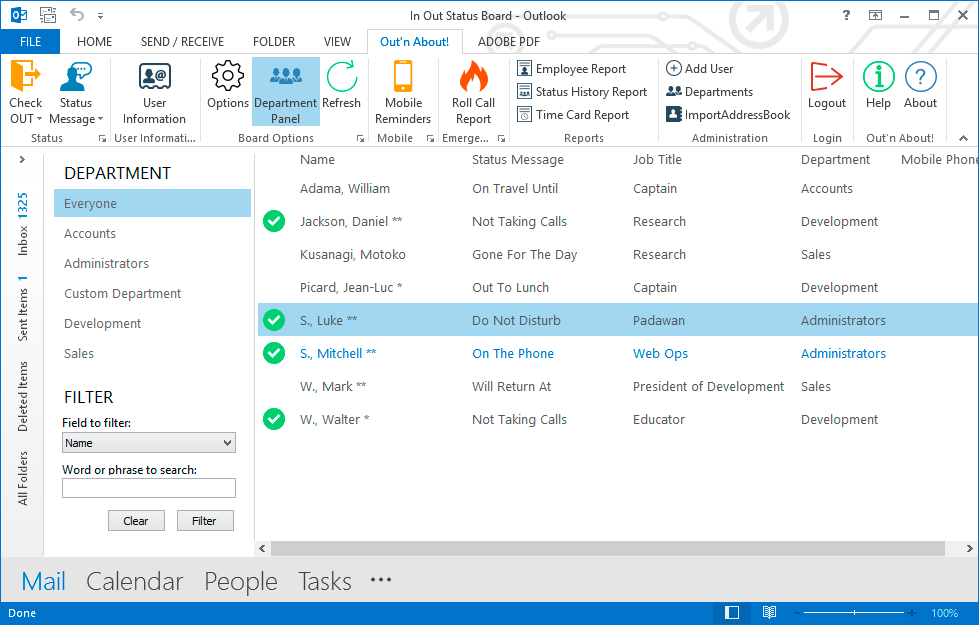
Main Window Out’n About! for Outlook is integrated directly into the Microsoft Outlook product. The In/Out Status Board can be displayed by clicking on the ‘Out’n About!’ folder in the mail folder list (as shown below) or the ‘Out’n About!’ shortcut in the Outlook shortcuts bar.
Outlook 2010/2013
Out’n About! for Outlook uses the Outlook 2010/2013 Fluent UI ribbon bar.
User Menu
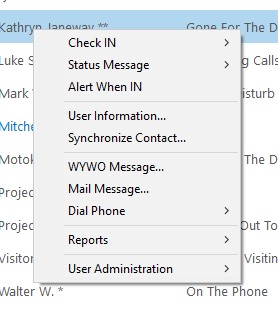
The Out’n About! user menu is available by double-clicking or right-clicking on any user on the In/Out Status Board. The user menu is used to display user information, send the user a message, synchronize the user’s contact data, etc. The administrator sub-menu is only available if you are an Out’n About! administrator. The change status sub-menu items are only available if the user is yourself or you are and Out’n About! administrator or receptionist.
Status Board
The In/Out Status Board displays information about each user in the system. The status board is the most important feature of the Out’n About! software. The status board contains one row of information for each employee that has been added to the Out’n About! system.
Column Descriptions
Status Column
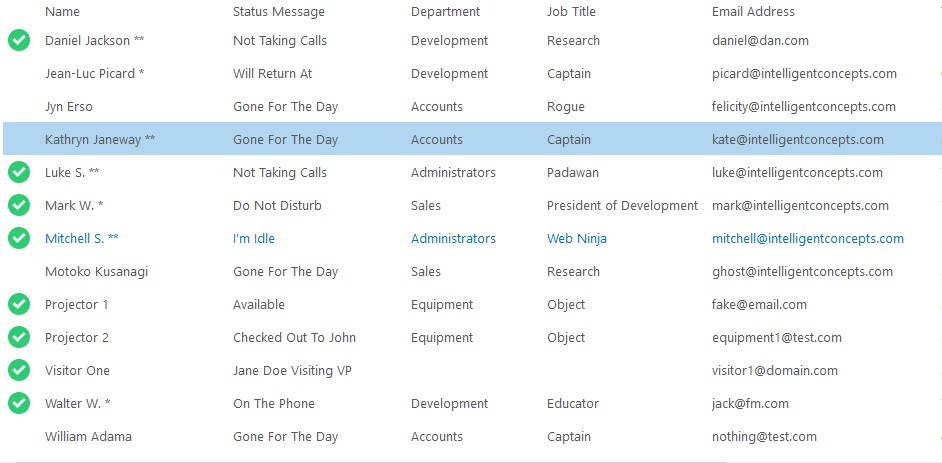
Out’n About! displays the current status of each user in the system using the In/Out marker . This makes it easy to see at a glance whether a user is available or not. If you set an alarm to alert when the user has checked In, a small alarm icon will be displayed.
Name Column
The name column shows the full name of the Out’n About! user. Your information is displayed in blue text to allow you to quickly identify yourself on the board. Receptionist users have a single asterisk (*) after their name. Administrators have two asterisks (**) after their name.
Status Message Column
The status message column displays amplifying information about a user’s current status.
Information Columns
There are a number of information columns that can be displayed for each user, such as phone number, department, fax number, etc. These columns are derived from the default Outlook contact data form and can be selectively displayed as you see fit.
Selecting Columns
You can decide what information you would like displayed for each user to best fit your needs by selecting the column(s) to display on the In/Out Status Board. To select the columns you wish to include on the board, right-click on any of the column headings. The software will display a menu of the commonly viewed columns for quick selection. You can also select the ‘More…’ menu item to see all of the columns available for display.
Rearranging Columns
You can rearrange the Out’n About! columns so they are in the order you wish to view them. This way you do not have to scroll the status board to see the information that is important to you. Note: the default columns cannot be moved (i.e., status, name, and status message).
To move a column, left click on the column header and hold down the mouse button. Drag the column to the position you would like and release the mouse button.
Resizing Columns
Columns widths can be resized to match the width of the actual data being displayed. To adjust the width of the column, position your mouse pointer over the divider at the right edge of the column header. When the mouse pointer changes into a double-headed arrow, click and hold down the left button of your mouse, then drag the divider until the column is wide enough. If a column is not wide enough to display the information, you can position your mouse pointer over the data and a tooltip will appear with all of the data displayed. Alternatively, if you double-click the mouse when the double-headed arrow cursor is shown, then software will automatically resize the column to best fit the data being displayed
Sorting
You can sort the information on the In/Out Status Board by the contents of a column. You can sort text, numbers, dates, etc. in ascending or descending order.
To sort a list in ascending order, click the heading of the column you wish to sort. To sort the list in descending order, click the heading of the column again.
Quick Select
To quickly select a user on your Out’n About! board, type the first few letters of the user’s last name. If a matching name appears on the status board, it will be highlighted. This is useful for organizations with a large number of users on the board. If you are unable to find a user’s name on the Out’n About! status board, make sure you have selected ‘Everyone’ from the Department List and you have cleared any filters.
Department Panel
Out’n About! allows users to be assigned to different departments within the company such as marketing, engineering, sales, or accounting. The Out’n About! Department Panel allows you to quickly select different departments for viewing. Click on any of the department names listed in the Departments Panel and the In/Out Status Board will only display the employees who belong to that department. The department panel also contains a filter dialog which allows you to filter users by different search criteria.
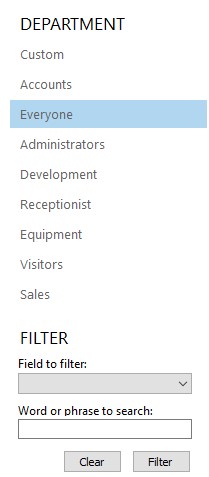
The Out’n About! Department Panel can be turned off and on to provide more room for the In/Out Status Board, by selecting the ‘Department Panel’ menu item from the ‘Out’n About!’ menu.
